Zentangle ATC, How To Make a Foam Stamp Plus An Usable Alternative To Embossing Ink
 |
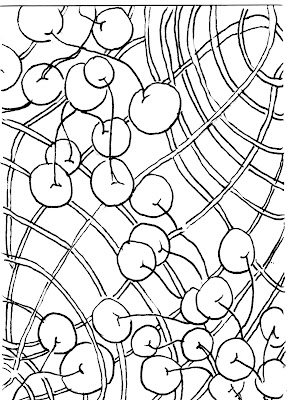
| This is the design that I came up with. |
Over at heARTist Trading Cards our next theme is Zentangles. I love making Zentangles so I looked forward to rendering this theme
The front and back of the cards, before any edge treatment to the ATC's
 |
| A single ATC - you can see the effect of the crackle gel and the gloss on some of the berries |
This week I tried another experiment this week. It was something that I had been meaning to try. I had been meaning to see if I could use my Sissix Big Shot machine to cut out foam shapes to use as stamps. I'm happy to say the "yes! you can!"
Again, the Spellbinder's die is on the left. The craft foam (orange) an the cut (and inked) foam 'stamp'" is laid out on the top alongside the Ancient Page brand stamp pad.
I use my favorite Stillman & Birn Beta series notebook for my experiments. I'm going to try their new Zeta series sketch book a try soon.
My craft foam was adhesive back, but you could certainly just use regular craft foam sheets. I cut it with my Sissix Big Shot using a Spellbinder's "Grateful Lattice" die and, voila!, the die cut became a foam stamp! It worked - and it worked well even! I used an Ancient Page brand stamp pad in black, and it did not budge when I used watercolors to paint! I did have to use a cardboard shim to get enough pressure to on the cutting plate to make clean cuts with the foam, but it worked quite easily enough.
Experiment number two this week was about using embossing powders when an embossing pad is just not juicy enough to get the job done. My most recent favorite brand of embossing powder is Stampendous Frantage Embossing powders. I like them because they are chunkier then regular embossing powders.
I have never used embossing powders quite the way most stampers do, but I do like the effect that they can give for borders and edges. The problem has always been that in order to get a rich, full embossed edge I need to repeatedly adding layers of embossing inks and powders several times to get a good edge, and that is simply too time consuming for me!
I decided to see if I could find any kind of substitute that would work well as an embossing ink and not require multiple applications. I've tried multiple types and brands of adhesives and nothing worked. Duh! Of course they were probably not supposed to. Then I had the idea to try using glycerin. It's an emollient, thick, liquid that you can find in the drug store. I had it on hand because I use it in hand cream recipes. I decided to try adding about two pumps of Purell to the mix, I think the alcohol helped with adhesion, but it works just fine without it.
Experiment number two this week was about using embossing powders when an embossing pad is just not juicy enough to get the job done. My most recent favorite brand of embossing powder is Stampendous Frantage Embossing powders. I like them because they are chunkier then regular embossing powders.
I have never used embossing powders quite the way most stampers do, but I do like the effect that they can give for borders and edges. The problem has always been that in order to get a rich, full embossed edge I need to repeatedly adding layers of embossing inks and powders several times to get a good edge, and that is simply too time consuming for me!
 |
| Dipping the edge of the ATC into the embossing powder that is contained in my little aluminum foil 'boat' |
 |
| The edge of the ATC covered with embossing powder |
 |
| Heated. Thick and glossy! |
The ATC with and without the embossed edge. The process works but now that I have edged the cards I wish that I had left them blank. I think the raw edge looked a bit cleaner . Oh well, next time I will leave well enough alone (maybe!).


Comments
Post a Comment
Thanks for the visit! I’d enjoy hearing what your thoughts are!